
The numerous steps required for using the Hydrolab can seem intimidating. The information on this page provides step-by-step instructions to help you get started. The manuals provide additional instructions on how to use the equipment and IISG’s Great Lakes educator is available for video calls to discuss the set-up procedures.
Pro-tip: Limno Loan educators have found it helpful to complete a test run in the classroom before deploying the equipment in the field. Students can use the picture guides in the spiral-bound Limno Loan program manual to practice setting up the Hydrolab.
Upon arrival and before return shipment, please make sure the following items are in the Pelican case:
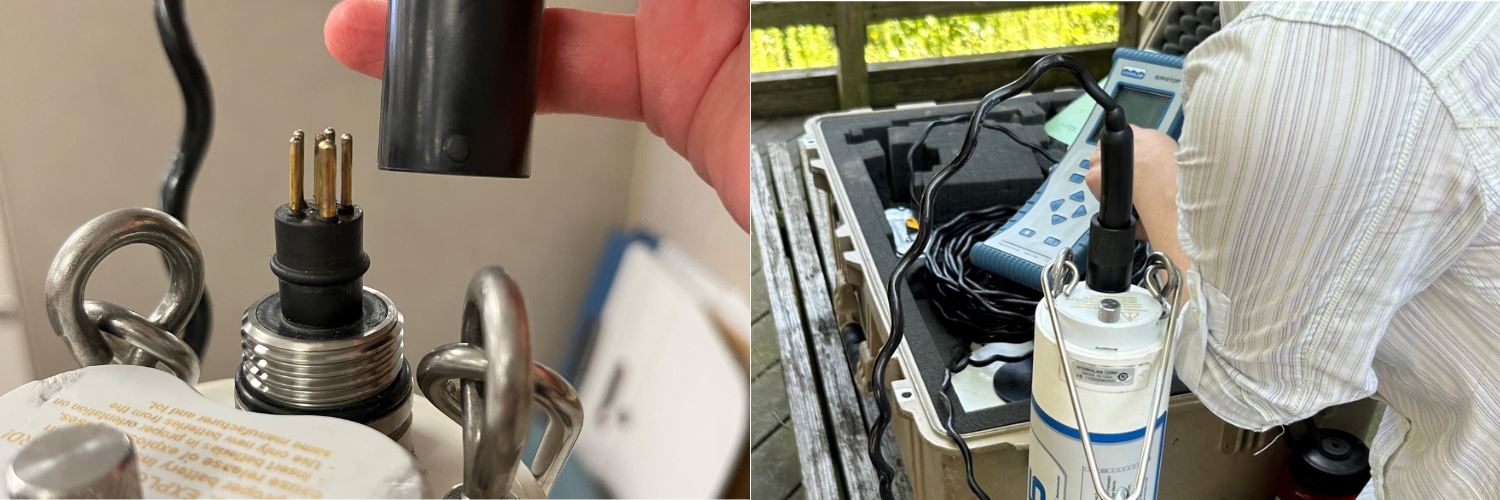
To plug in the cable, use the raised dot on the cable (left image) as your guide. It should line up with dot on the bulkhead connector and the largest prong. To secure the cable, pull the plug cover over the pins and screw down (right image).
All of the probes have been calibrated, but the dissolved oxygen (DO%) sensor must be recalibrated to match the barometric pressure of your location. Barometric pressure can change daily due to weather, therefore DO% should be recalibrated each day.
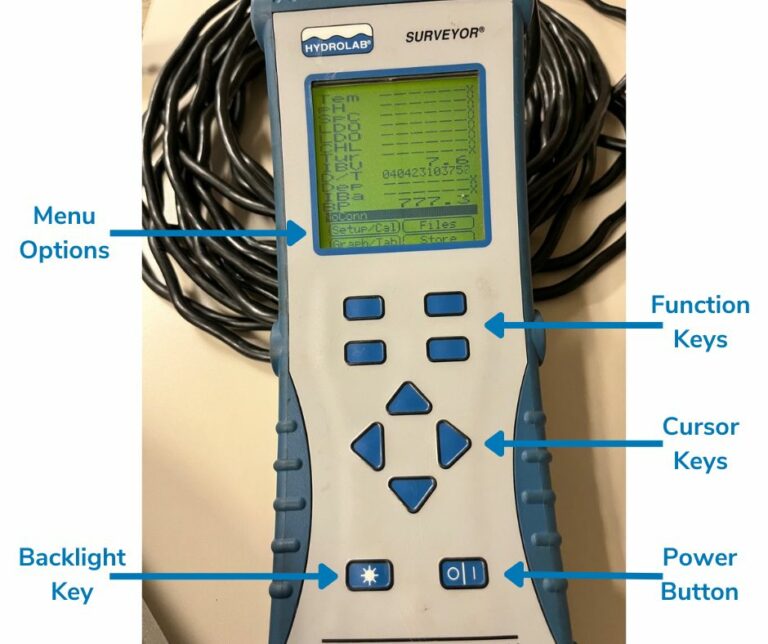
There are three main types of keys to navigate the Surveyor display.
Function Keys: each of the four rectangular keys corresponds to one of the four menu options found at the bottom of the screen display.
Cursor Keys: these four triangle keys move the cursor up, down, right, and left on the screen. Hold down the key to scroll.
Backlight Key: the rectangular key with the lightbulb icon controls the backlight for use in low light.
The Surveyor display should show all the parameters that the Hydrolab DS5 measures. However, if you would like to change the display, follow the instructions below:
This table defines the abbreviation and unit of measurement used for each parameter included with the sonde.
| Parameter | Abbreviation [Unit of Measurement] |
| Date and Time | D/T [month, day, year, hour, minute, second] |
| Depth | Dep [m] |
| Barometric Pressure | BP [mmHg] |
| Temperature | Temp [C°] |
| pH | pH [Units] |
| Chlorophyll a | CHL [μg/l] |
| Dissolved Oxygen Percent Saturation | LDO% [Sat] |
| Dissolved Oxygen Concentration | LDO [mg/l] |
| Turbidity | Tur [NTU] |
| Conductivity | SpC [μS/cm] |
| External or Internal Battery | EBa or IBa [% left] |
| Surveyor Battery | IBV [volts] |
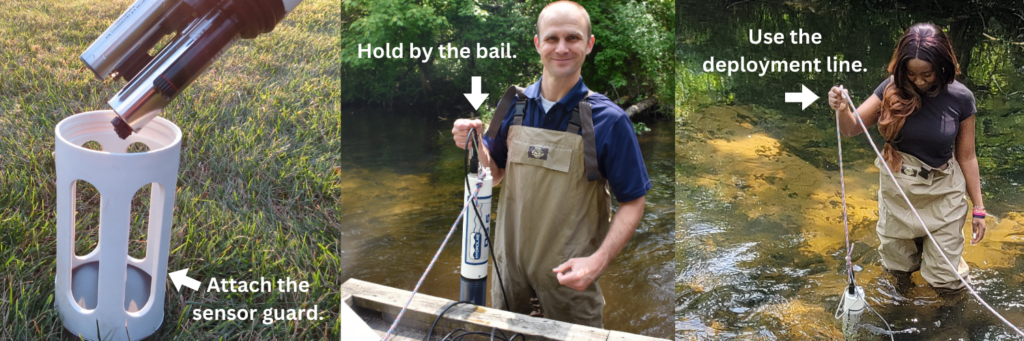
After the Hydrolab is set up and the dissolved oxygen calibration is complete you are ready to collect water quality data. Follow these tips for a safe and successful deployment:
The following videos provide a quick-start guide to using the Hydrolab.


Limno Loan
c/o Illinois-Indiana Sea Grant
Purdue University
195 Marsteller Street
West Lafayette, IN 47907-2033
Phone: 765-496-6009
Email: iisg@purdue.edu
This program is administered by Illinois-Indiana Sea Grant and funded by the Great Lakes Restoration Initiative via cooperative agreement between the U.S. EPA Great Lakes National Program Office and the National Oceanic and Atmospheric Administration.
© 2023 Illinois-Indiana Sea Grant.
All Rights Reserved.
Illinois-Indiana Sea Grant strives to ensure equal access and an inclusive environment.
Designed by Studio 2D